
Underglaze vs Overglaze: Which One Fits Your Pottery

Underglaze goes on before the glaze firing and gets sealed under a clear coat, which makes it the right pick for anything that needs to survive daily use, like mugs and dinner plates. Overglaze goes on after the piece is already glazed and fired, and it gets a second, cooler firing, which is why it produces the boldest colors and the only realistic route to gold or platinum accents. The two aren’t competing for the same job. They’re tools for different stages of the same piece.
Here’s the quick version, before you commit clay and pigment to anything:
-
Dishware, mugs, anything headed for the dishwasher: underglaze, sealed under a functional glaze.
-
Gold rims, luster accents, one-off decorative plates that will live on a shelf, not a table: overglaze.
-
Repairs or fixing a fired piece that came out flat: overglaze, since it’s the only one of the two that can go on top of an already-glazed surface.
The firing order matters more than most beginners realize. Underglaze goes on raw or bisque-fired clay and rides through the glaze firing with the piece. Overglaze can only go on a surface that’s already been glazed and fired once, then gets fired a second time at a much lower temperature. Mix up that sequence and you’ll waste a kiln load.
Key Takeaways
Underglaze seals color beneath the glaze for durable, functional ware, while overglaze adds vivid color and metallics on top of fired glaze at a lower second firing.
| Point | Details |
|---|---|
| Firing order is fixed | Underglaze goes on before the glaze firing; overglaze only goes on after glaze firing, refired at a lower temperature. |
| Durability favors underglaze | Sealed under a glaze layer, underglaze holds up far better to daily washing and utensil contact. |
| Color range favors overglaze | Lower firing temperatures preserve pigments and enable true metallics like gold and platinum. |
| Compatibility runs one direction | Overglaze can go over fired underglaze and glaze; underglaze cannot bond to an already-fired glazed surface. |
| Test before you commit | Fire test tiles with your exact clay, underglaze, and glaze combination before decorating a full piece. |
Table of Contents
Underglaze vs Overglaze at a Glance
Before you pick a technique, it helps to see the two methods side by side. The differences aren’t subtle once you line them up.
| Factor | Underglaze | Overglaze |
|---|---|---|
| Applied | Before glaze firing (greenware or bisque) | After glaze firing, on the fired glazed surface |
| Firing count | Part of the standard bisque + glaze cycle | Requires an additional, separate firing |
| Typical cone range | Cone 04–10, matching the glaze and body | Cone 018–015, a much lower temperature |
| Color range | Strong, earthy tones; some vibrant options | Widest range, including brilliant reds, and true metallics like gold and platinum |
| Finish | Sealed under matte or glossy glaze | Sits on the surface, can be matte, glossy, or metallic sheen |
| Durability | High, protected by the glaze layer | Lower, more prone to wear over years of use |
The single strongest reason to choose underglaze is longevity. Once it’s under a fired glaze, the color is part of the piece, not sitting on top of it, which is why it holds up to forks, sponges, and the dishwasher for years. The single strongest reason to choose overglaze is color range. Nothing else gets you a true metallic gold band or a luster finish that catches light the way overglaze does, because the lower firing preserves pigments that would simply burn out at stoneware temperatures.
On food safety, don’t assume either method is automatically fine for a lip or eating surface. Underglaze sealed under a well-fitted food-safe glaze is generally the safer bet for functional ware. Overglaze decoration, especially older-style enamels and some lusters, is often surface decoration only and may not be food-safe depending on the product and where it lands on the piece. Always check the manufacturer’s label before you decide a decorated rim is fine to drink from.
What Is Underglaze?
Underglaze is a pigmented ceramic compound, usually built from stains or metal oxides mixed with clay and flux, that you paint onto greenware or bisque before the glaze goes on. It gets sealed under a transparent or semi-opaque glaze during the main firing, which is why the color reads as part of the clay body rather than a coating sitting on top.
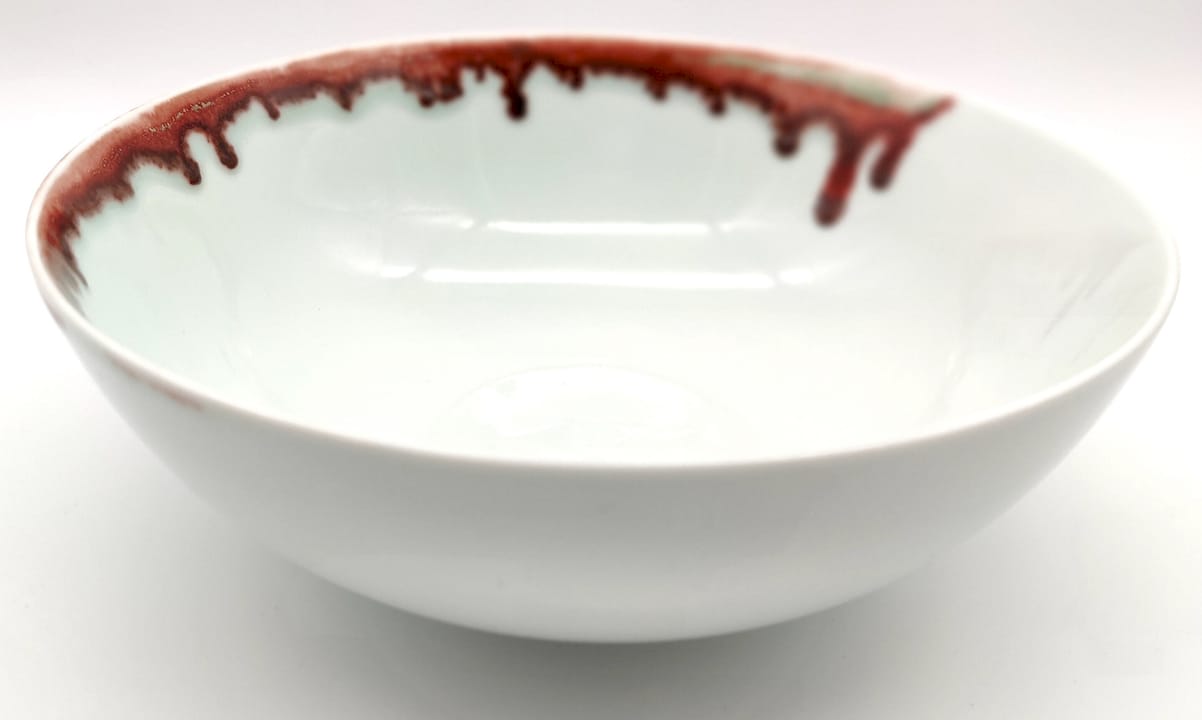
Most commercial underglazes are formulated with gum binders (often CMC) so they brush on smoothly and build up in even layers. That same gum content, though, comes with a catch: it can reduce the surface’s porosity once dry, which interferes with dipping in a glaze bucket and sometimes leaves crawling or bare patches unless you switch to a brushing glaze or adjust your glaze recipe. Underglazes also tend to carry higher clay and alumina content than glazes, which is part of why they sinter into the surface rather than melt and flow the way a glaze does.
Where you apply it matters. Leather-hard clay soaks up underglaze differently than bisque, which is already vitrified and less absorbent. Painting on leather-hard ware tends to give you more saturated, even color because the wet clay pulls the pigment in. Bisque application gives you more control for fine detail work since the surface is stable and won’t warp or smear under a wet brush.
A few application notes worth keeping in your back pocket:
-
Two to three thin coats almost always beat one thick coat, both for color depth and for avoiding cracking during the bisque firing.
-
Sgraffito, where you scratch through a layer of underglaze to reveal the clay body underneath, works best on a fully dry coat over leather-hard clay.
-
Underglaze pencils and transfers give you precision that a brush can’t, especially for lettering or fine linework.
Pro Tip: Build depth with layers, not pressure. Apply a base fill coat, let it dry, then blend a second layer while it’s still slightly damp to soften transitions between colors. Experienced painters use this wet-blending approach along with fine-line outlines applied last, which is how you get shading that looks intentional instead of muddy. Multiple thin layers beat one heavy pass almost every time.
What Is Overglaze?
Overglaze covers a family of paints, enamels, and lusters that go on top of a piece that’s already been glazed and fired once. It gets fired a second time, but at a dramatically lower temperature than the glaze firing that came before it, and that low-heat pass is the whole reason overglaze exists as a separate category.
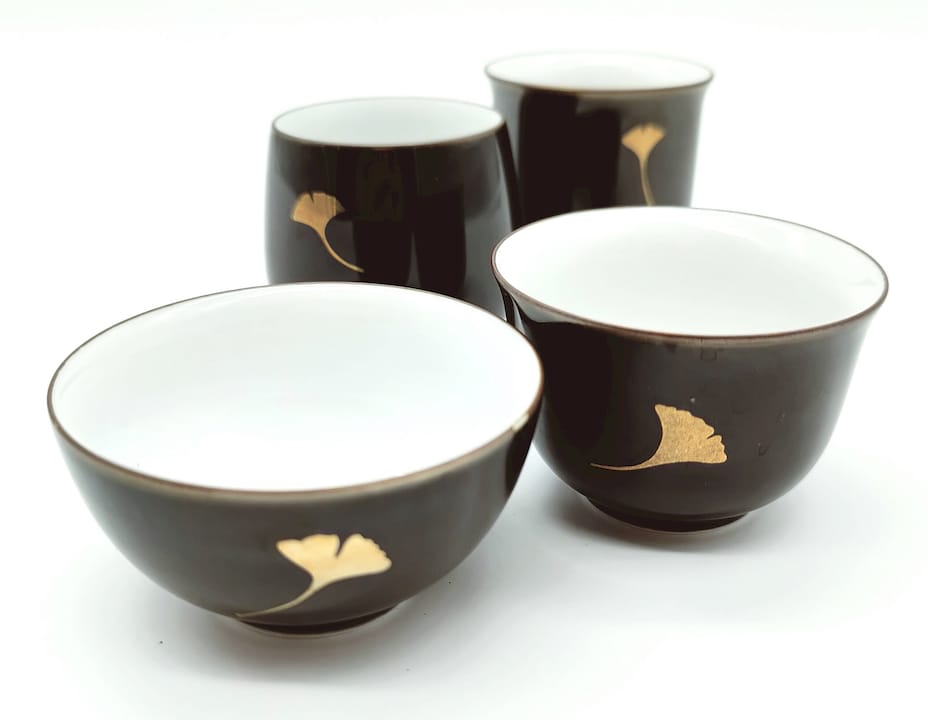
That cooler second firing, typically far below the temperature needed to mature a stoneware glaze, keeps delicate pigments and metal compounds intact instead of burning them off. It’s why overglaze delivers colors and metallics that underglaze simply can’t touch. Gold, platinum, and luster finishes are almost exclusively an overglaze technique, because those materials would vaporize or discolor at higher glaze-firing temperatures.
The trade-off is durability. Overglaze decoration sits on top of the fired glaze rather than being sealed beneath it, so it’s more exposed to scratching, utensil marks, and repeated dishwasher cycles over the life of the piece. Many overglaze products are meant for decorative or accent use rather than heavy daily contact, and manufacturers often flag them as surface-only decoration rather than functional-ware coatings.
That doesn’t make overglaze a lesser choice. It makes it a different one. A hand-painted gold rim on a decorative plate that lives on a shelf doesn’t need to survive a garbage disposal. It needs to look extraordinary, and that’s exactly what overglaze is built for.
-
Overglaze enamels give you the widest chromatic range of any ceramic decoration method.
-
Metallic lusters (gold, platinum, mother-of-pearl) are a defining strength unique to overglaze.
-
Best suited to accent work, commemorative pieces, and decorative ware rather than everyday dishware.
Pro Tip: Clean the fired glaze surface with alcohol before applying overglaze. Any residual oil from handling, or dust from the studio, will show up as a flaking or uneven patch after the second firing. Fire slowly on the way up and don’t rush the ramp, since overglaze pigments are more sensitive to thermal shock than the glaze underneath them.
Comparing the Details That Actually Change Your Results
The columns in the earlier cheat sheet get you oriented, but a few of these dimensions deserve more than a glance, especially if you’re planning a production run rather than a single piece.
| Dimension | Underglaze | Overglaze |
|---|---|---|
| Application timing | Greenware or bisque, before glaze | On top of fired, glazed surface |
| Firing schedule | One combined bisque + glaze cycle | Requires a distinct low-temperature refiring |
| Color vibrancy | Strong, natural, some limitations on brights | Highest vibrancy, true metallics available |
| Finish options | Matte to glossy, depends on glaze on top | Matte, glossy, or metallic sheen |
| Durability for functional ware | High, protected under glaze | Lower, best for accents and display pieces |
| Typical tools/techniques | Brush, sgraffito, stamps, pencils, transfers | Fine brush, transfer decals, luster pens |
Dishware and anything that’s going to see repeated washing belongs in the underglaze column, full stop. A one-off decorative vase meant to sit on a mantel has a lot more room for overglaze experimentation, because it will never face a sponge or a fork.
Compatibility is where a lot of first attempts go sideways. Can you put overglaze over underglaze? Yes, and it’s actually a common combination: fire the piece with underglaze under a clear or lightly tinted glaze, then add overglaze accents like a gold rim or luster highlights on top after that firing. Can you put underglaze on top of an already-fired glaze? No. Underglaze needs a porous surface to bond to, and it won’t adhere properly to a glassy, already-fired glaze layer. If you’re decorating a piece that’s already been glaze-fired, overglaze is your only option.
One more pitfall worth flagging before you glaze a whole batch: not every transparent glaze plays nicely over every underglaze. Some combinations produce clouding from micro-bubble formation trapped between the two layers, which is a chemistry mismatch, not a technique failure. Test a tile with your exact glaze and underglaze pairing before committing a full kiln shelf to it.
How to Apply and Fire Each Method
The steps below assume a standard electric studio kiln setup, the kind most community studios and home potters use across the U.S.
Underglaze workflow:
-
Choose your surface. Leather-hard clay gives richer, more saturated color; bisque gives you steadier control for detail work.
-
Apply two to three thin coats, letting each dry to the touch before adding the next.
-
Use sgraffito, stamps, or transfers for detail work once your base coats are dry.
-
Let the piece dry completely, then bisque fire if you started on leather-hard clay.
-
Apply a compatible clear or tinted glaze over the underglaze, favoring a fluid-melt clear glaze applied thinly to avoid clouding.
-
Fire to your glaze’s maturing temperature, typically cone 04–10 depending on the clay body and glaze.
Overglaze workflow:
-
Start with a fully fired, glazed piece. Clean the surface with alcohol to remove oils and dust.
-
Apply overglaze enamel or luster with a fine brush, transfer, or specialty pen, working in a dust-free area.
-
Let it dry fully per the manufacturer’s instructions before loading the kiln.
-
Fire at a low temperature, commonly in the cone 018–015 range, with a slower ramp rate than a standard glaze firing to avoid thermal shock to the delicate pigments.
-
Vent the kiln as directed for luster products, since some release fumes that need to escape rather than settle back onto the piece.
Roughly one full firing cycle separates these two paths. Underglaze rides along inside your existing bisque and glaze schedule. Overglaze adds a dedicated third firing on top of that, which is worth factoring into both your timeline and your electric bill if you’re running a home studio kiln.
Always read the manufacturer’s label before you trust a product on food-contact surfaces. Lab-tested lusters and food-safe overglaze lines exist, but plenty of overglaze products are explicitly marked decorative-only, and that label is not a suggestion.
Pro Tip: Before you commit a finished piece, fire a test tile with your exact underglaze color and your exact clear glaze, at your exact cone. Clouding and bleeding are almost always a glaze-and-underglaze compatibility issue, not a technique mistake, and the only way to catch it is on a tile you’re willing to lose.
Fixing the Most Common Underglaze and Overglaze Problems
Most decoration failures trace back to one of a handful of repeat offenders. Here’s what’s actually happening and how to fix it.
-
Clouding under a clear glaze: usually caused by micro-bubbles trapped in the glaze layer over the underglaze. Switch to a fluid-melt transparent glaze and apply it as thinly as you can.
-
Crawling or bare spots after glazing: commercial underglazes with gum binders can reduce surface porosity, which keeps a dipped glaze from wetting evenly. Try a dedicated brushing glaze, or thin your dipping glaze into more of a thixotropic slurry.
-
Running colors that bleed into each other: too much water in the underglaze mix, or layers applied before the previous coat fully dried. Let each layer dry to the touch, and keep your brush drier than feels natural at first.
-
Overglaze flaking after the second firing: almost always an adhesion problem from oils, dust, or an under-fired second cycle. Clean with alcohol before application and don’t rush the firing ramp.
-
Overglaze pinholing or bubbling: often too much material applied at once. Thin coats, applied twice, beat one heavy pass.
Pro Tip: Fire a batch of small test tiles that mirror your actual clay body, underglaze, and glaze combination, then fire them on the exact same schedule you plan to use for the real piece. This is the single habit that separates potters who get consistent results from those who’re still guessing.
Some failures aren’t worth chasing. If a piece has minor clouding but is otherwise sound, decide honestly whether it’s headed for daily use or for a shelf. A shelf piece can absorb a cosmetic flaw that a mug in daily rotation can’t.
Choosing Underglaze or Overglaze for Your Project
Match the method to what the piece actually needs to do, not to whichever technique looks more exciting on a given afternoon.
-
Functional dinnerware, mugs, anything dishwasher-bound: underglaze under a durable, food-safe glaze, every time.
-
A one-off decorative plate or commemorative piece: overglaze gives you room to experiment with color and metallics without worrying about wear.
-
Metallic accents on an otherwise functional piece: underglaze for the base color and body, with small overglaze or luster accents kept away from high-wear surfaces like the interior of a cup.
-
Small commercial production runs: underglaze usually wins on cost and time, since it doesn’t require a second firing cycle for every piece.
-
Repairing or embellishing an already-fired, glazed piece: overglaze is your only real option, since underglaze won’t bond to a fired glaze surface.
Hybrid work is more common than beginners assume. A lot of professional-looking ceramics use underglaze for the base palette and reserve overglaze strictly for a gold rim, a luster highlight, or a signature mark. That combination gets you both durability where it matters and standout color where it counts.
Pro Tip: If you’re torn between the two, ask what the piece has to survive. A mug that gets washed 300 times a year needs underglaze’s protection. A plate that goes on a wall needs whatever look sells you on it, durability be damned.
What Studio Potters Get Wrong About Underglaze and Overglaze
A short checklist beats a long lecture when you’re standing at the wheel or the glazing table:
-
Test tile every new underglaze and glaze combination before committing a finished piece.
-
Note the cone, ramp rate, and hold time for every firing, and write it down where you’ll actually find it later.
-
Keep clear glaze coats thin over underglaze to avoid clouding.
-
Skip high-gum commercial underglazes on pieces you plan to dip rather than brush glaze, unless you’ve adjusted your glaze recipe accordingly.
-
Photograph results next to your notes so you can match a look back to the recipe that produced it.
The biggest mistake isn’t picking the wrong method. It’s skipping the test tile because the piece feels too special to risk on a sample. Every experienced maker has a story about the one time they didn’t test first, and it never ends with a piece they kept.
One useful anchor point: a red underglaze mug from Myspinshop’s own catalog shows what a well-sealed underglaze finish looks like on porcelain that’s meant for daily use. The color reads deep and even because it’s fired under the glaze, not sitting on top of it, which is the whole point of choosing underglaze for something you’re actually going to drink from.
Pick the Tool, Not the Trend
Potters get talked into treating underglaze and overglaze as a rivalry, and that framing wastes energy better spent testing. The question was never which technique is better. It’s which one matches what the piece has to survive and what it’s trying to say. A mug that’s getting stacked in a dishwasher for the next decade has a different job than a plate that’s going on a wall, and the decoration method should follow the job, not a personal preference.
What I’d push back on is the instinct to master one technique and stop there. The most interesting work usually comes from combining both: underglaze doing the heavy lifting for color and durability, overglaze showing up for a single accent that earns its keep. Keep a test log. Fire tiles before you fire pieces. The potters who get consistent, repeatable results aren’t the ones with better instincts. They’re the ones who wrote down what worked the last time.
Frequently Asked Questions
Can you put overglaze over underglaze? Yes. This is a standard combination: the piece is decorated with underglaze, covered with a clear or tinted glaze, fired, and then overglaze accents like gold or luster go on top in a second, lower-temperature firing.
Can you put underglaze on top of a glaze? No. Underglaze needs a porous surface to bond to during firing, and it won’t adhere properly to an already-fired glassy glaze. Use overglaze products for decorating a piece that’s already been glaze-fired.
Is underglaze or overglaze safer for everyday dishes? Underglaze sealed under a food-safe glaze is generally the better choice for functional tableware. Many overglaze products are marked as decorative-only, so always check the manufacturer’s label before using a decorated piece for food or drink.
Why does my clear glaze look cloudy over underglaze? Clouding usually comes from micro-bubbles forming in the glaze layer. Switching to a fluid-melt transparent glaze and applying it thinly usually clears it up.
Do underglaze and overglaze fire at the same temperature? No. Underglaze fires along with the glaze, typically in the cone 04–10 range depending on the clay body. Overglaze fires much lower, typically cone 018–015, in a separate firing after the glaze firing is complete.
If you’re drawn to the deep, sealed-in color underglaze produces on functional porcelain, browse Myspinshop’s handcrafted porcelain gifts for tea lovers to see the technique applied to pieces made for daily use, not just display.
Sources
For readers who want to go deeper into the chemistry or troubleshoot a specific glaze pairing, a few sources stand out.
-
What Are the Differences Between Overglaze, Inglaze and Underglaze - Royalware China
-
Depth by 1,000 Strokes: Terri Kern’s Meticulous Underglaze Decoration